Planning your Mia recovery time is just as important as choosing your surgeon. The more clearly you understand the first two weeks—what you’ll feel, what you’ll do, and when you can safely resume work—the calmer and smoother your breast augmentation recovery will be. This Turkey-focused guide maps your day-by-day timeline, outlines realistic post-op restrictions, and shares proven swelling and pain management strategies. You’ll also find return-to-work guidance for desk vs. active jobs, a sample symptom diary, and red flags that tell you it’s time to call your surgeon.
If you’re comparing dates or job constraints right now, message us while you read:
✅ Ask on WhatsApp for a tailored timeline
The Big Picture: What “Mia Recovery Time” Really Means
Philosophy First: Minimal Access, Maximum Control
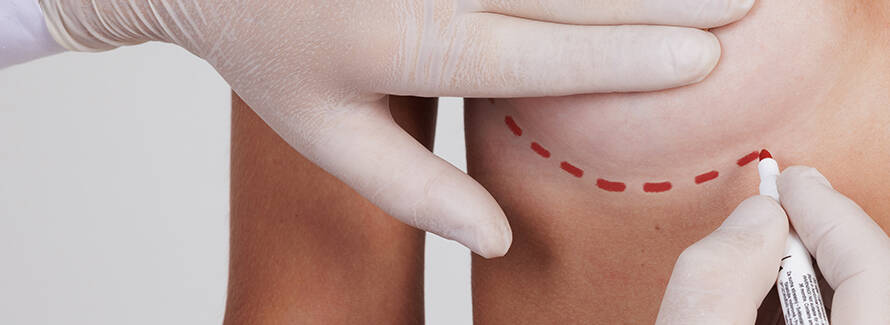
Mia prioritizes minimally invasive access (often via an underarm incision) and precise pocket control, aiming for a subtle, proportional outcome. In many eligible patients, this approach translates to a streamlined early recovery, provided you strictly follow post-op restrictions and communicate with your care team.
Your Variables Matter
No two patients heal exactly alike. Your baseline fitness, tissue quality, implant/pocket choices, and pain sensitivity all shape your experience. Consider this guide your structured baseline—your surgeon’s instructions always come first.
Day-by-Day Symptoms and Milestones (First 14 Days)
Day 1 (Surgery Day)
- Symptoms: Chest tightness/pressure, mild grogginess from anesthesia/sedation, local soreness.
- Milestones: You’re ambulatory with assistance; fluids and a light meal are tolerated; pain is controlled using your scheduled regimen.
- To-dos: Begin short, frequent walks to promote circulation. Use head-of-bed elevation and cold packs (as advised) to start swelling and pain management early.
Day 2–3 (Peak Swelling Window)
- Symptoms: Swelling often peaks; tightness may temporarily increase; sleep can be fragmented.
- Milestones: You find your rhythm with pain meds, hydration, and rest cycles; transitions (sit/stand) become easier.
- To-dos: Keep a medication & hydration log; perform gentle shoulder mobility within post-op restrictions; prioritize nutrition (protein + fluids).
Day 4–5
- Symptoms: Soreness starts to ease; pressure shifts to a “fullness” sensation; bruising can look more visible before it fades.
- Milestones: Many desk-job patients feel ready for light duties—only with surgeon clearance.
- To-dos: Maintain support bra use; continue icing/elevation protocol; refine sleep routine.
Day 6–7
- Symptoms: Energy improves markedly; swelling is heading down.
- Milestones: You can expand light daily activities while keeping post-op restrictions in mind.
- To-dos: Prepare for Week 2: discuss driving readiness, desk-work schedule, and hygiene upgrades with your team.
Week 2 (Days 8–14)
- Symptoms: Tightness continues to diminish; soft tissues begin adapting to the new shape; swelling declines.
- Milestones: Many office-based patients are back at work; gentle, surgeon-approved cardio may re-enter toward the end of Week 2.
- To-dos: Keep incision care meticulous; confirm green lights for travel, side-sleeping, and light household tasks.
Not sure if your progress is on track? Send a brief update (symptoms + photos) to the coordinator:
💬 WhatsApp check-in
Medications, Dressings, and Hygiene (The “Routine” That Prevents Problems)
Medications
- Pain control: Take doses on schedule—don’t “chase” pain.
- Antibiotics (if prescribed): Complete the full course; set phone reminders.
- Anti-inflammatories: Only if your surgeon allows; some protocols time NSAIDs carefully to reduce bleeding risk.
- Supplements: Clear everything (even “natural” products) with your surgeon.
Dressings & Garments
- Initial dressings: Keep them dry and intact until your first check.
- Support bra: Wear as instructed—this is central to swelling and pain management and pocket stability.
- Steri-strips/tape: Do not remove unless directed; premature removal undermines scar quality.
Hygiene
- First shower: Usually after the first check or per written protocol; avoid soaking and direct pressure on incisions.
- Underarm care (if transaxillary): Gentle deodorant and shaving only when cleared—start fragrance-free and watch for irritation.
- Laundry: Wash garments frequently to minimize skin irritation.
Sleep, Driving, and Daily Activities
Sleep
- Position: Back-lying with the upper body slightly elevated helps edema and protects pocket stability.
- Comfort hacks: Keep water, meds, and your phone at arm’s length; consider a body pillow to minimize rolling.
- Progression: Discuss side-sleeping during Week 2+; don’t switch early without approval.
Driving
- Rules: Never drive under the influence of sedating pain meds.
- Readiness test: You must comfortably turn the wheel, check blind spots, and brake without chest/arm pain. Many patients wait several days to a week, pending clearance.
Daily Activities
- Desk work: Often feasible earlier than active roles; optimize your workspace (monitor at eye level, supportive chair, keyboard close).
- Household tasks: Avoid lifting, overhead reach, vacuuming, and heavy doors until cleared.
- Kids & pets: Arrange help for lifting; if you must get close to the floor, squat with legs—don’t pull with arms/chest.
Return-to-Work: Desk vs. Active Jobs
Desk Jobs (Office, Remote, Admin)
- Typical arc: Some patients return in several days to a week if pain is controlled and post-op restrictions are respected.
- Ergonomics: Keep elbows close; avoid high shelves and long reaches; schedule micro-breaks for short walks.
Active Jobs (Healthcare, Teaching, Retail, Service, Fitness)
- Typical arc: Expect a longer ramp-up. Avoid lifting, pushing, pulling, and overhead reach until your surgeon says it’s safe.
- Staged plan: Consider a phased return (light duties → partial shifts → full duties) to protect healing.
Share your job description (lifting, overhead reach, shifts) to receive a custom clearance ladder:
🗂 WhatsApp → Get a return-to-work map
Post-Op Restrictions (What Not to Do—And Why)
The Core “Don’ts” (Early Phase)
- No lifting (bags, toddlers, weights).
- No overhead reaches (high shelves, stretching with arms above shoulder height).
- No strenuous cardio or strength (jostling/rhythmic movements stress tissues).
- No soaking (baths, hot tubs, pools) until cleared; keep incisions dry.
Clothing & Friction
- Prefer soft fabrics; avoid tight seams under the arm or across incisions.
- Use a smooth robe or button-down top early on to avoid over-the-head dressing.
Workouts (Phased Return)
- Walking: Day 1–2 in short laps; add distance gradually as comfort allows.
- Cardio: Light, non-jostling options may resume near the end of Week 2 if cleared.
- Strength: Lower body first; upper-body and chest are reintroduced later, stepwise.
Swelling and Pain Management: What Actually Works
The Fundamentals
- Ice & elevation: Short, consistent sessions with a cloth barrier; head-of-bed elevation at night.
- Hydration + protein: Support healing with water/electrolytes and protein-rich meals (unless medically restricted).
- Breathing & micro-movement: Diaphragmatic breathing and gentle shoulder circles (below restriction limits) improve comfort and circulation.
Smart Timing
- Set alarms for meds; steady relief prevents spikes.
- Meal planning: Small, frequent meals curb nausea from meds; include fiber to offset constipation risk.
Comfort Extras
- Body pillow to stabilize sleep posture.
- Silky layers to reduce friction near incisions.
- Warm showers (once cleared) to relax the shoulder girdle without stretching wounds.
When to Call Your Surgeon (Don’t Wait)
Red Flags
- Sudden, one-sided swelling or rapidly increasing firmness.
- High fever, expanding redness, or foul drainage.
- Shortness of breath, chest pain, or calf tenderness (seek emergency evaluation).
- Uncontrolled pain not responding to your regimen.
- New asymmetry that’s sharp and unlike your baseline photos.
“Gray Area” Issues You Should Still Report
- Medication intolerance (nausea, rashes).
- Tape sensitivity around dressings.
- Sleep disruption from tightness despite routine adherence.
A quick message avoids guesswork:
⛑ WhatsApp your symptoms now
Sample Two-Week Planner (At-a-Glance)
Week 1 (Days 1–7)
- Daily: Walks, hydration, scheduled meds, support bra, head-of-bed elevation.
- Goals: Pain controlled; swelling trending down after Day 2–3; short desk tasks if cleared.
- Avoid: Lifting, overhead reach, strenuous cardio, soaking.
Week 2 (Days 8–14)
- Daily: Bra compliance, gentle mobility, nutrition focus, incision care.
- Goals: Light normalcy; desk work for many; consider light cardio late week if cleared.
- Avoid: Upper-body strength work until staged back under guidance.
Communication & Tracking (Your Mini “Clinical Notebook”)
Photo Log
Take photos in consistent lighting/angles—evening check-ins are ideal. Before/after comparisons reassure you and inform your surgeon.
Symptom & Activity Notes
Track pain scores, sleep quality, steps walked, and meds taken. Patterns help your team fine-tune advice.
Don’t Crowdsource Your Health
Forums can be helpful, but your plan is customized. Always prioritize your surgeon’s advice over generic anecdotes.
Turkey-Specific Tips (Travel, Packages, and Timing)
If You’re Traveling to Turkey
- Aim for a 5–7 day stay to cover surgery and early checks.
- Consider packages with airport transfers, hotel partnerships, and coordinator support.
- Confirm fit-to-fly timing for your return trip.
Scheduling Around Work
- Put non-movable deadlines on the calendar first; then schedule surgery to protect Week 1.
- For active jobs, ask your clinic for a phased-responsibility letter you can share with your employer.
Want a travel + work plan that fits your exact dates?
🗺 Send your constraints on WhatsApp—get a custom timeline
FAQs (10 Quick Answers)
1) How long is the typical Mia recovery time for desk jobs?
Many desk-based patients feel ready in several days to a week, provided pain is controlled and the surgeon approves.
2) When does swelling peak during breast augmentation recovery?
Often around Day 2–3, then it gradually declines. Consistent swelling and pain management helps.
3) Can I sleep on my side in Week 1?
Usually no—most are asked to sleep on the back with elevation early on. Discuss side-sleep timing in Week 2+.
4) When can I drive?
Only when you’re off sedating pain meds and have full control without pain. This is often several days to a week, but always get clearance.
5) What are the biggest post-op restrictions?
No lifting, no overhead reach, no strenuous cardio/strength, no soaking until cleared, and strict garment compliance.
6) How do I handle tightness/pressure?
Scheduled analgesics, elevation, icing per protocol, gentle diaphragmatic breathing, posture resets, and consistent support bra use.
7) When can I start cardio again?
Some patients resume light, non-jostling cardio near the end of Week 2, only if cleared.
8) What if one breast looks more swollen?
Mild asymmetry is common early, but sudden one-sided swelling needs immediate surgeon input.
9) When can I use deodorant or shave if the incision is underarm?
Only when cleared and the incision is settled; start with gentle, fragrance-free products and take care with friction.
10) How do I know if my progress is normal?
Compare to your written plan; use a photo log; message your team with updates. When uncertain, contact the clinic.
Final Takeaway: Calm, Consistent, and Customized
Your Mia recovery time is manageable when you plan the first 14 days with intention: scheduled meds, hydration, post-op restrictions, and smart swelling and pain management. Most anxiety fades once you know what’s normal and what calls for attention. The safest path is a clear plan, regular check-ins, and a phased return-to-work tailored to your role.
When you’re ready to translate this guide into a personal recovery roadmap—with dates, job constraints, and a packing list—reach out:
- 📞 WhatsApp—get a personalized recovery plan
- 🧭 WhatsApp—confirm return-to-work timing
- 🩺 WhatsApp—post-op restrictions Q&A